Install Motion Path — it’s free → See the product page
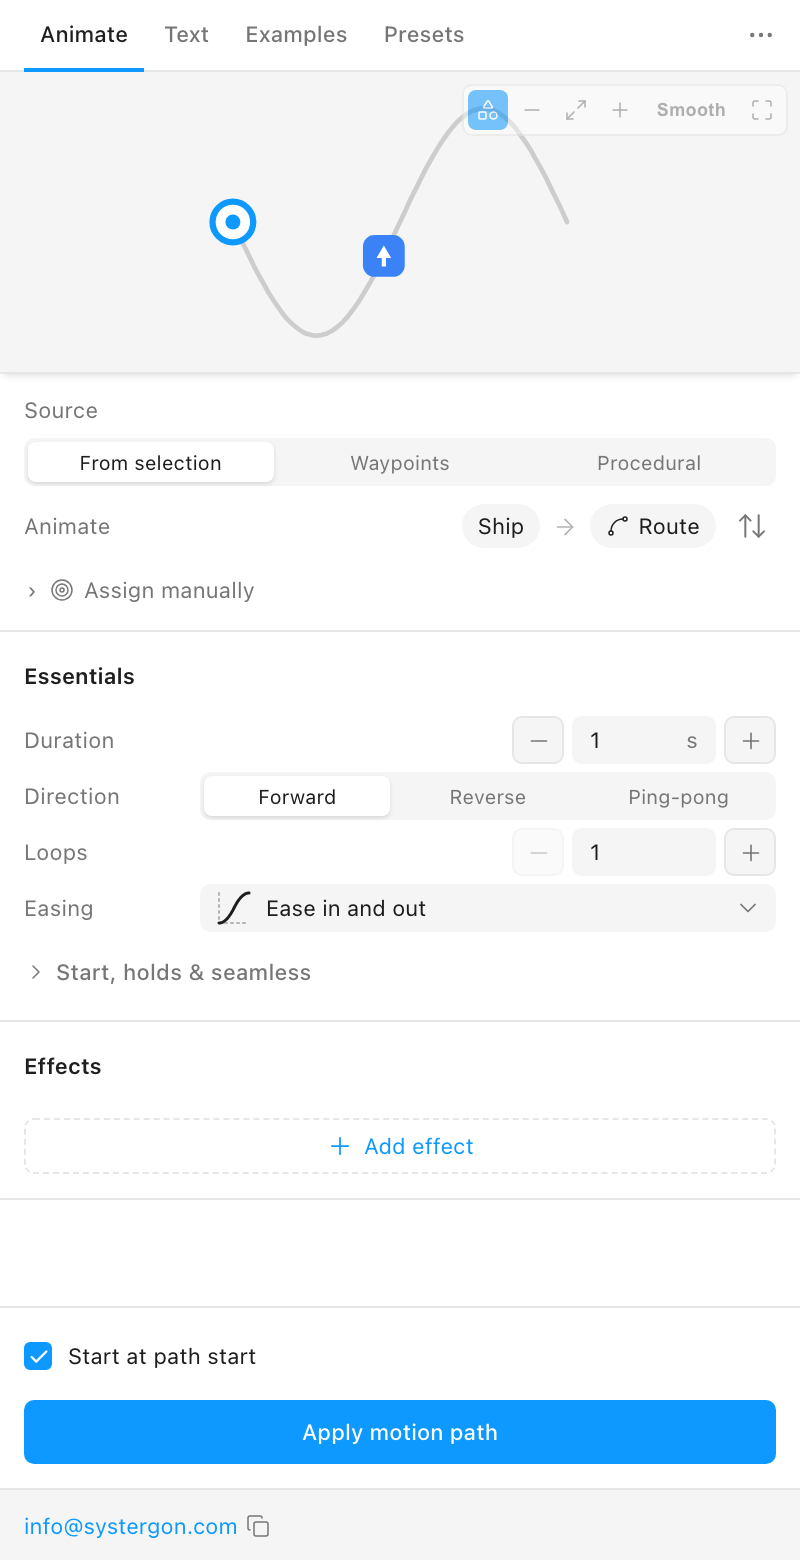
The short answer: apply your motion with Motion Path, open the … menu in the plugin titlebar, choose Export video, and press Export MP4. MP4 is already selected when the panel opens, and the defaults — 30 fps, High quality, 100% — are right for almost every use. Figma encodes the file itself, so what downloads is canvas playback rather than a recording of it.
MP4 is the format that asks nothing of anyone. It plays in Slack, in a deck, in a message thread, on a phone, in a browser, without a plugin or a player or a conversation about codecs. That universality is the entire reason to choose it — and it is also why it is the wrong choice in the three specific cases at the end of this page.
First, apply the motion. The plugin previews your animation live in the panel, but that preview writes nothing to the canvas. Export reads the canvas, so an MP4 taken before you press Apply motion path is a video of something standing still.
Second, open Export video from the … menu.
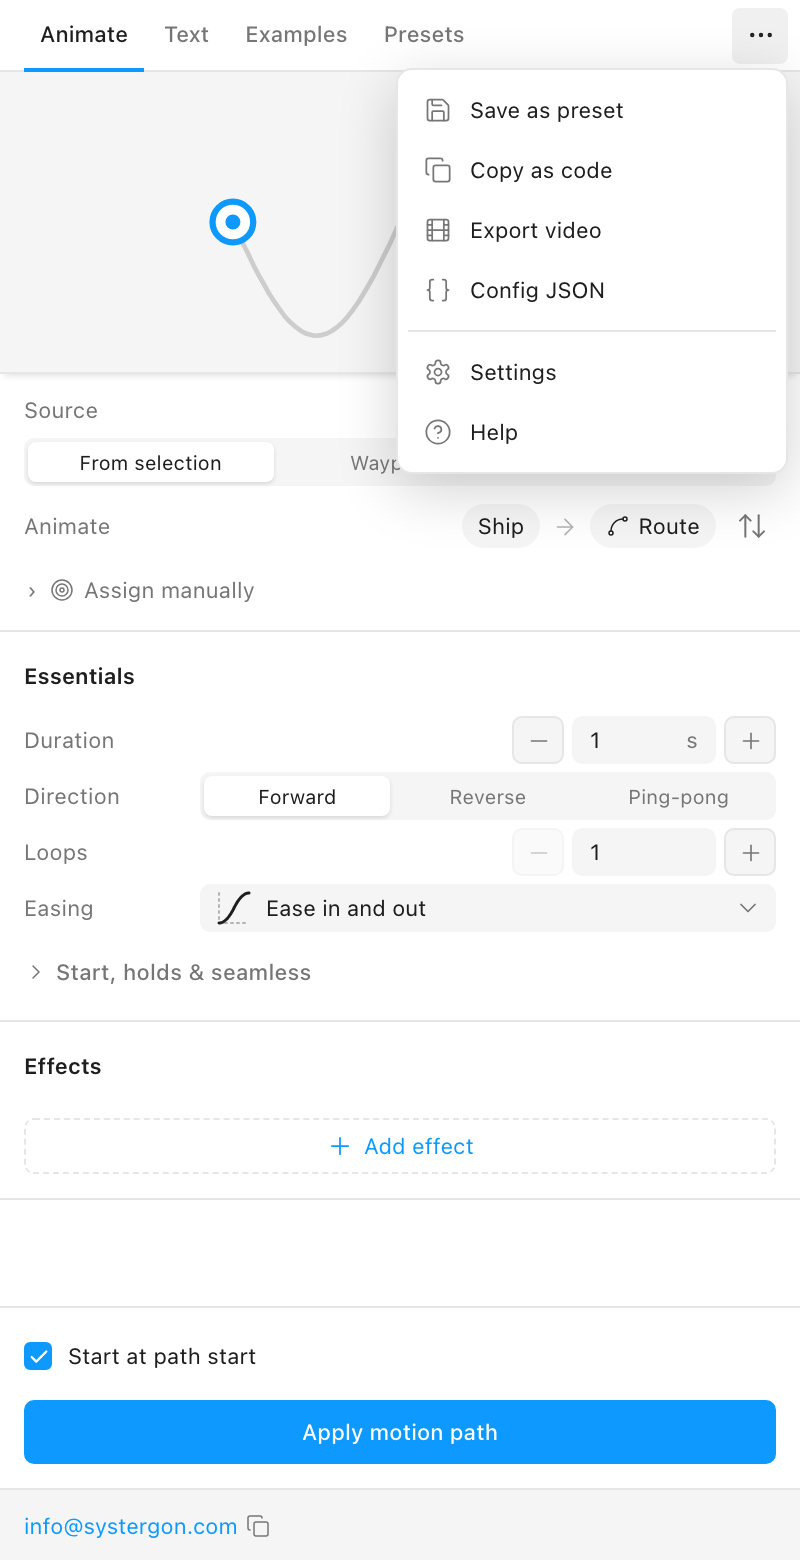
Third, press Export MP4. The whole sequence, held a beat per step:
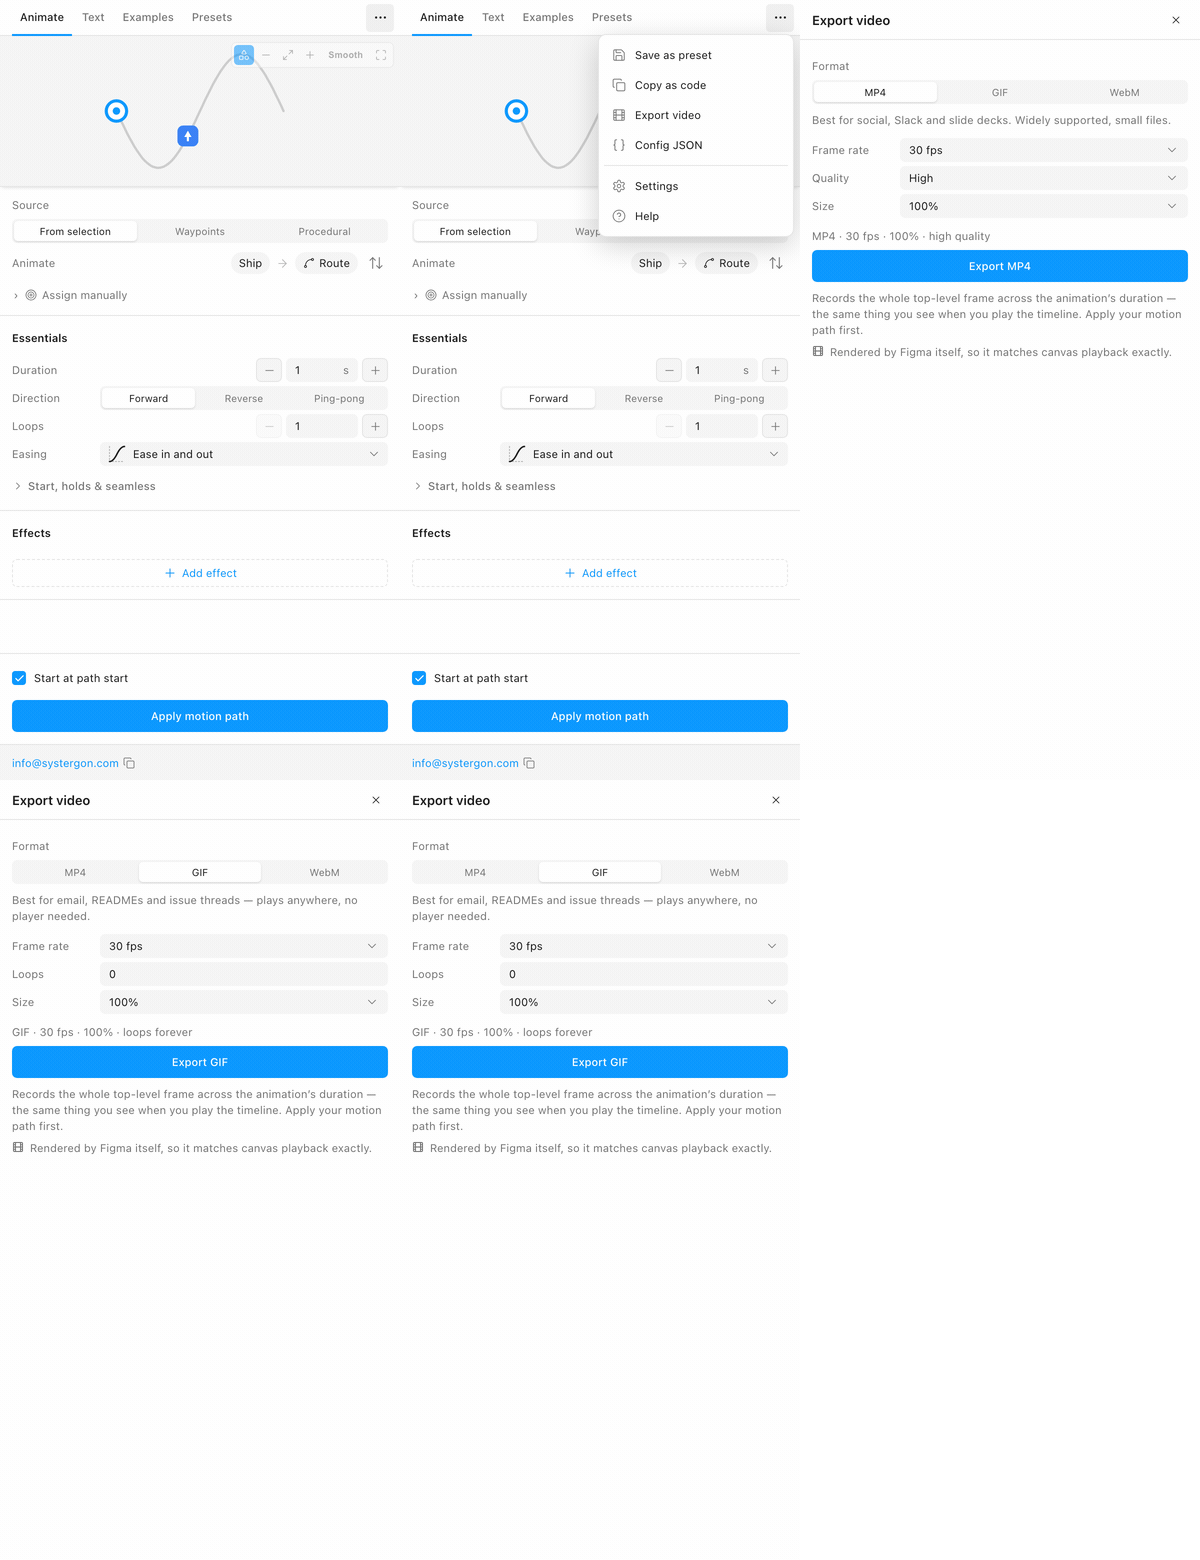
That is genuinely all of it. Everything below is about the three settings between those steps, and about knowing when to leave them alone.
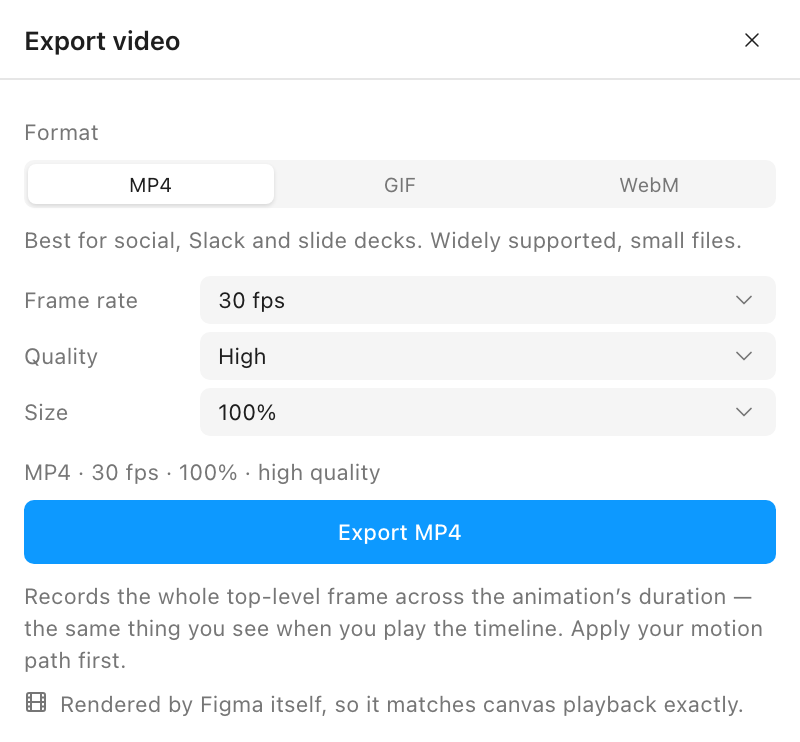
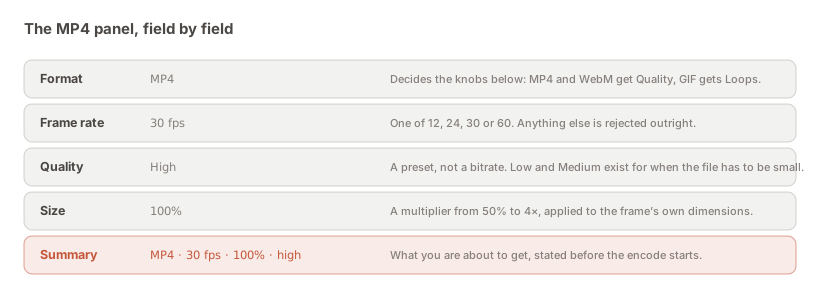
Five things, one of which is not an input. Taking them in order:
MP4 is selected by default. The choice matters beyond the file extension because it decides which fields appear below: MP4 and WebM get a Quality preset, GIF gets a Loops count instead, because loop count is the knob GIF actually has and quality is not.
If you switch away and back, the panel keeps your frame rate where it can. Where it cannot — GIF caps at 30 fps and MP4 allows 60 — it snaps to the nearest legal rate rather than letting you submit something the encoder will reject. Ties resolve downward, so switching never silently upgrades you to a heavier export.
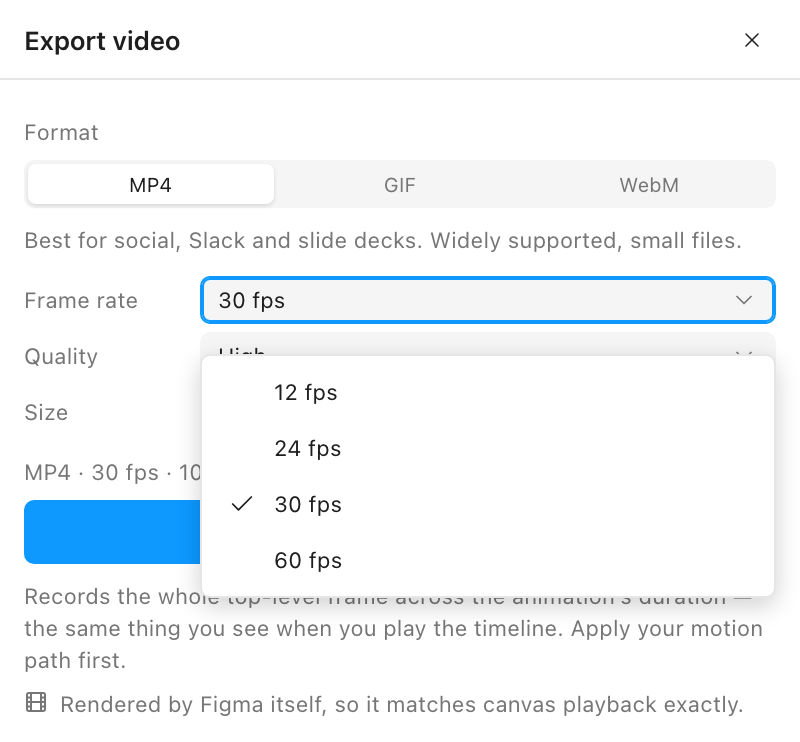
MP4 accepts 12, 24, 30 and 60. Those are the only values — they are a literal union in the plugin API, so anything else is a rejected export rather than a slightly worse one, and the panel therefore offers no others.
30 is the default and is right for almost everything. Reach for 60 only when the motion is fast and someone will watch it closely, because it doubles the encoded frames for a difference most viewers will not consciously notice on a two-second clip. 24 gives a slightly filmic cadence and a smaller file. 12 is a deliberate stylistic choice that reads as stepped animation — useful occasionally, never a way to save space quietly.
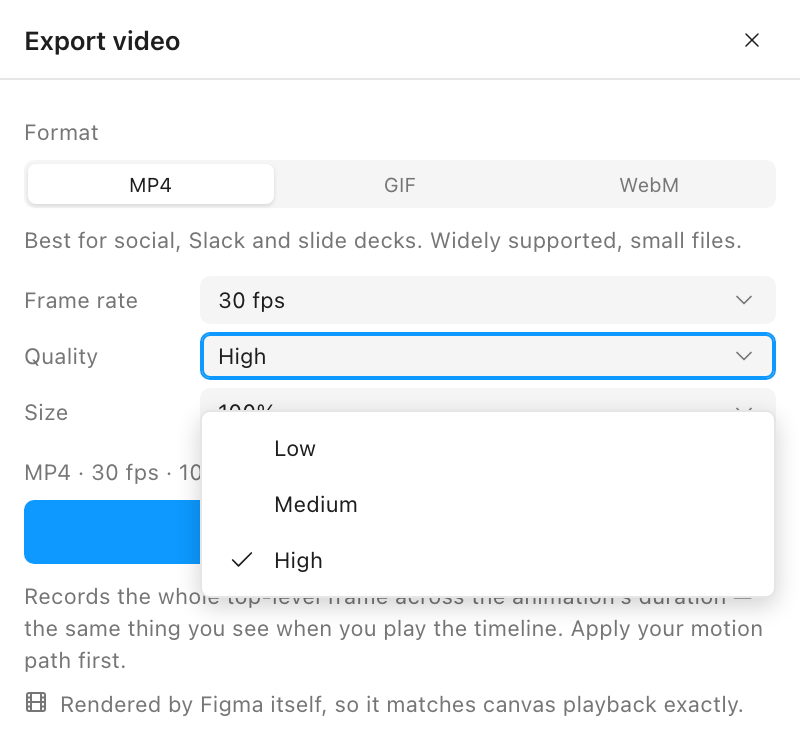
A preset, not a bitrate: Low, Medium, High. High is the default. Because Figma is encoding flat vector artwork rather than camera footage, High is cheaper here than the word suggests — large areas of solid colour compress extremely well. Drop it only when you are up against a hard size limit and would rather lose fidelity than resolution.
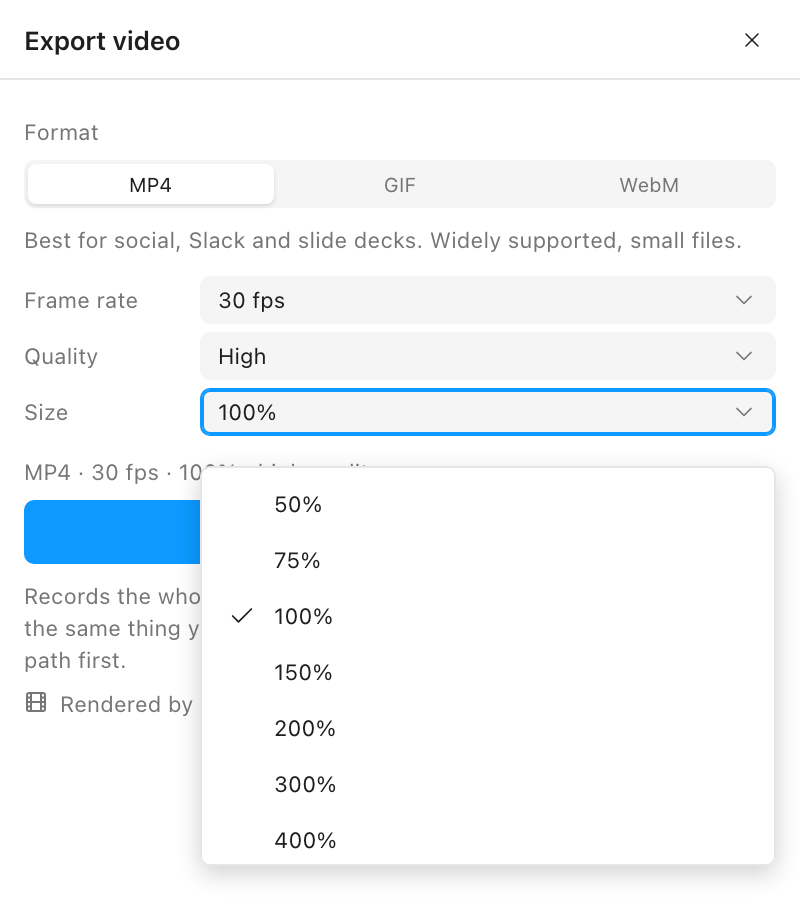
A multiplier applied to the frame’s own dimensions, from 50% to 4×. This is the field most likely to be misused, and the reason is in the next section.
Under the controls sits one line reading something like MP4 · 30 fps · 100% · high quality. It is not a setting; it is a statement of what you are about to get, placed before the button on purpose. Reading it takes a second and is faster than exporting twice.
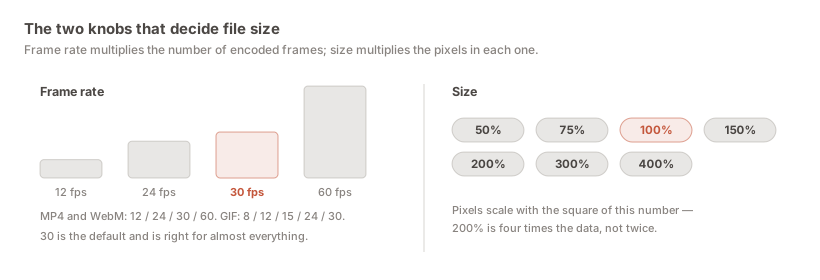
The two knobs compound differently, and the difference matters when a file is too big.
Frame rate scales linearly. 60 fps is twice the frames of 30. Halving the rate roughly halves the work.
Size scales quadratically. 200% is four times the pixel data, not twice; 400% is sixteen times. This is the trap: the multiplier looks like a quality control, and it is not. Scaling a 100% export up to 200% does not add detail — the source artwork is whatever resolution the frame is. It multiplies the data describing the same picture.
So when a file is too heavy, drop the frame rate first. It costs less visually than you expect on short clips, and it costs far less than you would lose by halving the size. And when you genuinely need a crisper large render, make the frame bigger in Figma and export at 100% — or, if what you actually want is resolution independence, you do not want a video at all. You want Lottie, which is vector and has no resolution.
Nothing in the export panel controls how long the clip is. That is decided on the Animate tab, by duration, loops and direction — and it affects file size more than any of the three export settings do.
A four-second clip at 30 fps is 120 encoded frames. The same clip at 60 fps is 240. Halving the duration saves more than dropping from High to Medium, and it costs nothing visually because you were probably showing one idea for twice as long as it needed.
Loops matter here too. If your motion repeats the traversal three times on the Figma timeline, the encoder faithfully records all three — you get three times the file for something a viewer will experience as a loop anyway, because the player loops it. One clean pass, looped by the player, is almost always the better artefact. Direction, loops and seamless covers the settings.
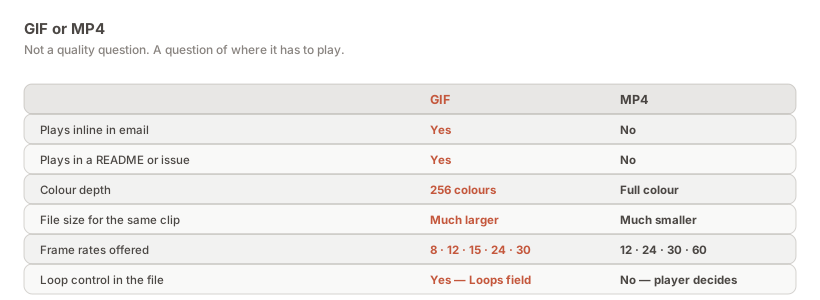
There are exactly three cases, and they are worth knowing precisely because MP4 is right the rest of the time.
Email, READMEs and issue threads. These render images but will not run a video element, so an MP4 arrives as an attachment or a link rather than as motion. GIF is the only format that plays inline there. It costs you 256 colours and a much larger file, and in that one context it is worth it. Everything about GIF in the video export guide.
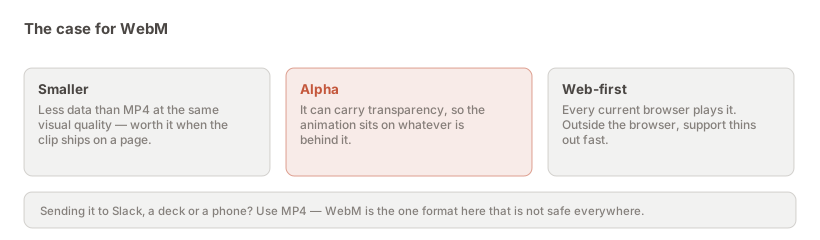
A web page where the animation sits on a coloured or patterned background. MP4 has no alpha channel, so your animation arrives on an opaque rectangle. WebM does support alpha, and is smaller besides. It is a web-only answer — support outside browsers thins out fast — but on a web page it is the better one.
The animation is going into a product. This is the big one. A video is finished pixels: it cannot be recoloured, resized without loss, paused at 40% while a form validates, sped up on a fast connection, or driven by application state. If an engineer has to ship the motion rather than look at it, they need a description of it, not a recording.
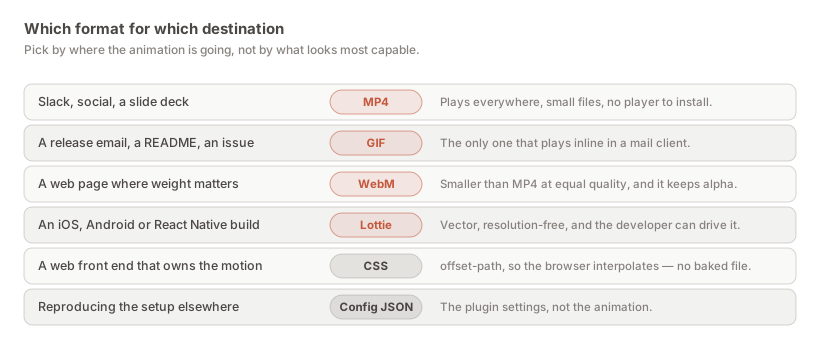
The useful habit for that last case is to send both: the MP4 so they can see the intent in one second without opening anything, and the Lottie so they can build it.
An MP4 is pixels over time, and it is worth being explicit about what that excludes, because the gaps are invisible until someone downstream needs one of them.
It carries no layer names, no structure and no text you can select or search. It carries no interactivity — a prototype hotspot, a hover state, a scroll trigger all flatten to whatever happened to be on screen. It carries no colour tokens or styles, so nobody can pull a hex value out of it. And it carries no audio, because a Figma timeline has none.
None of that is a defect; it is what “a video” means. The failure mode is treating the MP4 as the handoff rather than as the illustration accompanying one. If the recipient needs any of those things, the MP4 is not the deliverable — it is the covering note.
The file arrives named by Figma, and if three of them end up in a Slack thread nobody can tell which is which a week later. It is worth renaming on the way out, because the cost of not doing it lands on whoever has to find the right one under review pressure.
What actually helps is naming for the decision rather than the settings: checkout-success-v3.mp4 beats export-30fps-high.mp4, because the person looking for it remembers what it showed, not how it was encoded. Where a clip is one of several options being compared, numbering them in the order they will be discussed saves a surprising amount of meeting time.
And if a clip is going to be re-exported repeatedly as a design iterates — which is the normal case, not the exception — keep the version marker in the name rather than relying on the download timestamp. Timestamps survive the download folder; they do not survive being pasted into a document.
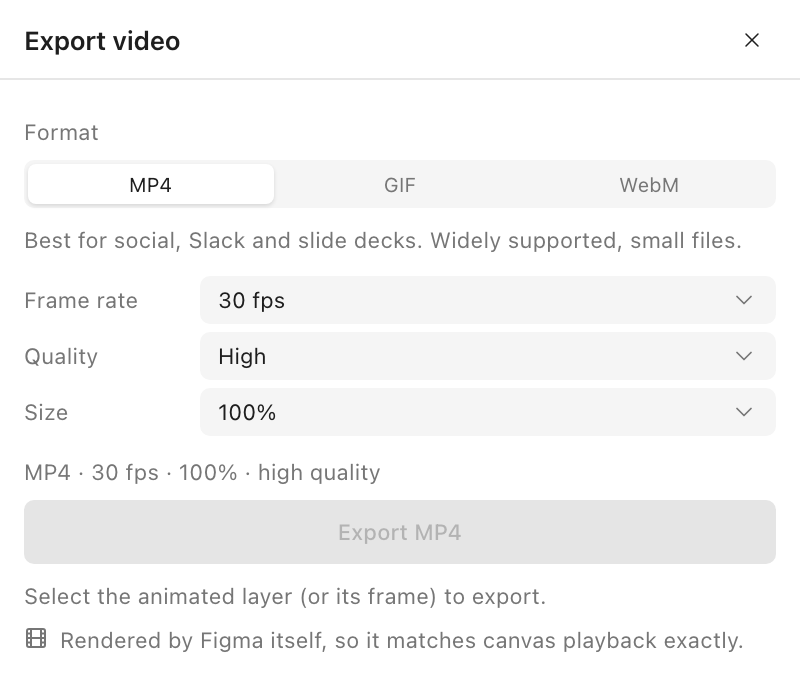
Two states disable it, and the panel names which one you are in. Either nothing is selected, or the selection is not inside a frame with a timeline. There is also a third failure that is not an error at all: the export succeeds and the file shows a static frame, which means the motion was previewed but never applied.
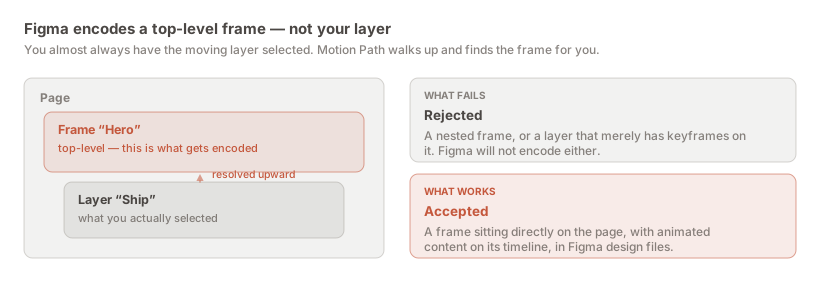
Figma encodes a top-level frame — one sitting directly on the page. You will normally have the moving layer selected instead, and the plugin resolves upward to find the frame, so either selection works. A nested frame does not.
Apply your motion with Motion Path, open the … menu in the plugin titlebar, choose Export video, and press Export MP4. MP4 is selected by default, and the default settings suit most uses.
Figma has the encoder — it arrived in Plugin API Update 131 — but it is reachable through the plugin API rather than as a button in the Figma UI, so a plugin has to call it. The encoding itself is Figma’s, not the plugin’s.
30 fps, unless you have a reason. MP4 accepts 12, 24, 30 and 60. Use 60 only for fast motion someone will study; it doubles the encoded frames for a difference most viewers will not notice on a short clip.
Shorten the clip first, then drop the frame rate, then drop the quality preset. Reducing the size multiplier is a last resort because it costs resolution — and note the reverse, that raising it costs data quadratically without adding detail.
No — MP4 has no alpha channel. Use WebM, which does, if the destination is a web page. Outside a browser, support for WebM is patchy, so an opaque MP4 is usually the safer artefact.
The motion was previewed but never applied. Press Apply motion path so the native keyframes exist on the canvas, then export again.
Not directly. Quality is exposed as Low, Medium and High presets rather than a numeric bitrate, because that is the shape of the underlying API. Frame rate, size and clip duration are the levers that actually move file weight.
MP4 has no loop flag in the file — looping is up to whatever plays it, and most players and social platforms loop short clips by default. If you need a guaranteed loop count baked in, that is GIF, which has a Loops field.
No. Video export runs in Figma design files only.
Install Motion Path — it’s free → Browse 300+ animation examples