Install Motion Path — it’s free → Download the starter file ↓
Figma Motion can keyframe position, scale, rotation and opacity. What it has no primitive for is a camera — the single move that carries a shot across a scene, pushes into a detail, and tilts a few degrees on the way. This is how to build one, using a path you draw yourself.
We’re going to animate a delivery map. The shot opens wide on the pickup pin, sweeps across town to the drop-off, pushes in 1.55× as it arrives, and rolls about 7° through the turn. One continuous move, roughly four seconds — written as real native Figma Motion keyframes. Inspectable in Dev Mode, exportable to CSS, and editable in the Motion panel afterwards like anything else you keyframe by hand.
The finished move. Left: what the viewport shows. Right: what is actually happening on the canvas — the artwork travelling a path you drew, seen through a fixed window. Drag the scrubber to inspect any frame.
Everything below uses Motion Path, a free Figma plugin. It doesn’t run its own animation engine: it samples a vector you draw and writes real, native Figma Motion keyframes onto your layer’s timeline — the same tracks you’d get keyframing by hand, just along a path Motion has no way to express on its own.
Install Motion Path from the Figma Community →
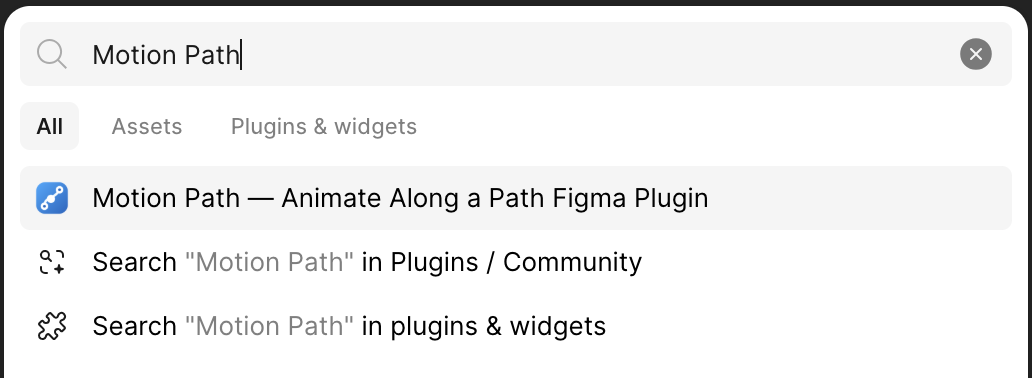
Once it’s installed, there are two ways to run it. Either works — the first is faster:
The plugin opens in a panel beside your canvas and stays open while you work, so you can keep selecting layers and re-applying without reopening it.
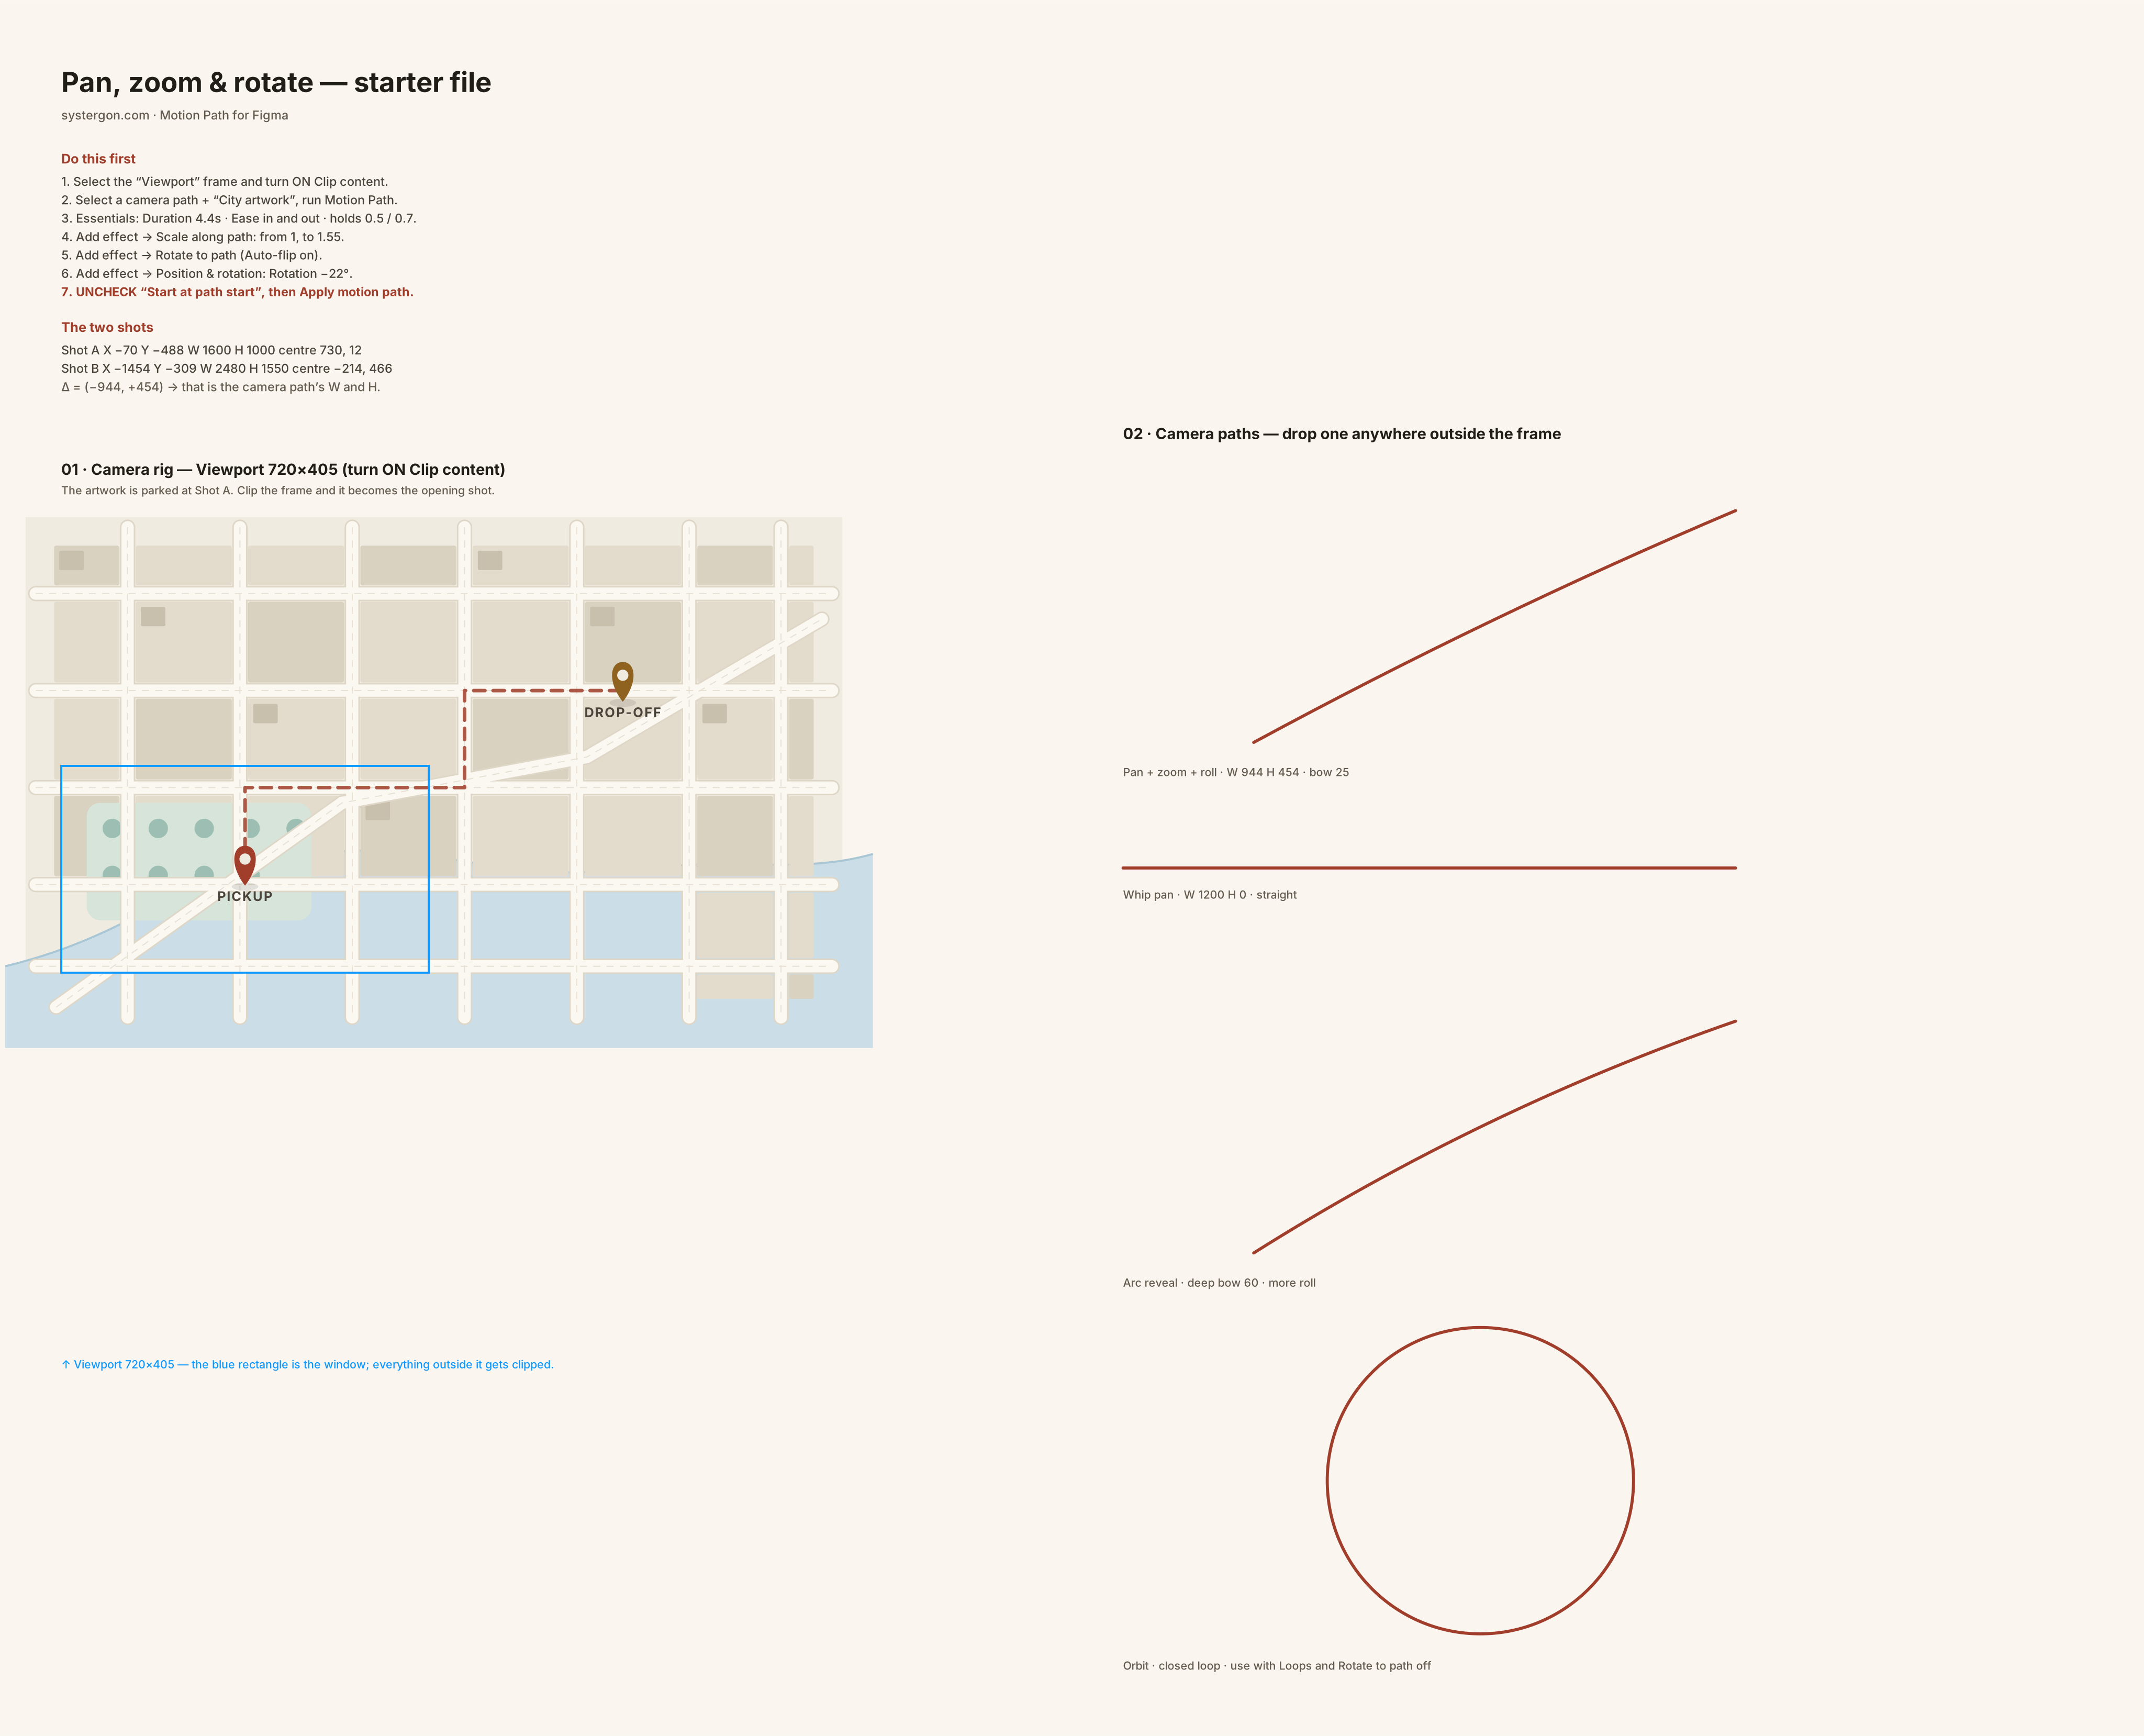
You don’t have to build the scene from scratch. The starter file below is the exact file this tutorial uses — the viewport, the artwork, both pins, and four ready-made camera paths, all named. Download it and drag the SVG straight onto a Figma canvas.
Download the Figma starter file ↓
Prefer to use your own artwork? Skip it — the method is identical, and Build it, step by step tells you which numbers to swap.
There is no camera in Figma, and there doesn’t need to be. A camera move is just a fixed window onto a picture that moves — a slide travelling under a microscope. So you build a two-part rig:
Everything follows from that one inversion, including the rule that trips up everyone the first time: the picture travels opposite to the camera. A camera that pans right is a picture that slides left. A camera that pushes in is a picture that scales up. A camera that rolls clockwise is a picture that rotates anticlockwise.
Same shot, two ways to think about it. Left is the mental model — a window gliding right across the map. Right is what you actually build — the map gliding left under a window that never moves.
Motion Path animates the picture. You draw a vector, it samples that vector by arc length and writes Translation X / Y keyframes onto the artwork’s timeline — plus Scale for the zoom and Rotation for the roll. Your path is the artwork’s trajectory, so you draw it as the mirror of the camera move you want.
The starter file below is a complete, ready-to-animate scene: the viewport, a 1600×1000 city artwork with both pins placed, four pre-drawn camera paths, and the instructions on the board. Download it and drag the SVG straight onto a Figma canvas — layer names and groups come across intact.
Download the Figma starter file ↓
One thing SVG cannot carry is the clip flag — step 1 turns it on, which takes a single click.
The numbers below match the starter file exactly, so you can follow along and check your inspector against mine. If you’re using your own artwork the method is identical — only the values change.
Select the board named Viewport — a 720×405 frame — and turn on Clip content in the right sidebar. This is the one thing the starter SVG can’t bring across, and the one thing the whole effect depends on: without it the artwork simply spills over the edges and there is no window.
Inside it sits City artwork, 1600×1000 — well over twice the viewport in both directions, which is what gives the camera room to travel. The artwork must live inside a frame, because that is what gives it a Motion timeline. A layer sitting loose on the page has nothing to keyframe onto, and the plugin will tell you so.
Drag City artwork until the pickup pin sits in the middle of the viewport. That’s your first shot; compose it by eye, the way you would any other frame. In the starter file it lands at X −70, Y −488, at its natural 1600×1000.
Now write down its centre: 730, 12 — that is X + W/2, Y + H/2. The centre is the number that matters, because Motion Path moves the artwork rigidly: the whole animation is one displacement of that point.
Now compose the last frame. With the artwork selected, lock the proportions and set W 2480 — that’s 1600 × 1.55, our zoom. Then drag until the drop-off pin is centred. In the starter file that’s X −1454, Y −309 at 2480×1550, giving a centre of −214, 466.
Subtract the two centres and you have the move: (−214, 466) − (730, 12) = (−944, +454). Left 944, down 454. That’s the path you’re about to draw — and because you framed both shots by hand, the zoom is already baked into it. No trigonometry required.
Then press ⌘Z until the artwork is back at the opening shot. The animation has to start there.
With the Pen tool, click twice to draw a straight line running down and to the left — direction matters, since the object travels from the first point to the last. Drop it on the canvas anywhere outside the viewport frame; only its shape and size are ever used, never its location.
Select the vector and set its dimensions in the inspector: W 944, H 454. That’s the displacement, exact.
Then curve it. Double-click into the vector, hold ⌘ for the Bend tool, and drag the middle of the segment sideways by about 25px. A straight path gives a mechanical move; a shallow bow gives the shot a natural arc — and, in step 8, the roll.
The path is the artwork’s trajectory. The dot is the artwork’s centre, the dashed outline is the artwork, the blue rectangle is the fixed viewport. The whole picture slides down-left past the window — which reads as a camera moving up and to the right.
Select both the path vector and City artwork, then run Plugins → Motion Path. On the Animate tab, the Setup section should already read From selection, with Path set to your vector and Animate set to the artwork.
The first selected vector becomes the path and everything else becomes an object. If the two ended up swapped, hit the swap button between the rows, or select a layer and use Set as path / Set as object to pin the roles explicitly.
Setup, with the roles resolved.
Camera moves live or die on timing. In Essentials, three values:
Then open Start, holds & seamless and set Hold start 0.5s and Hold end 0.7s. Those two beats are what separate a camera move from a slide transition: the shot arrives, settles, and is allowed to be looked at.
Essentials — duration, loop and easing, with the holds disclosed underneath.
Pan only. Everything so far, with no zoom and no roll. Correct, and flat — the next two steps are what give it depth.
Scroll to Effects and hit + Add effect. Under Deform, choose Scale along path and set Scale from 1, Scale to 1.55 — the same factor you sized shot B by.
One thing worth knowing: Figma scales a layer about its own centre, not the centre of your viewport. The reason the zoom still lands on the drop-off pin is that the translation you measured in step 3 already accounts for it — you sized the artwork then read the centre. That’s the whole reason for framing shot B by hand instead of guessing.
The Effects library with Scale along path added — an entry you can mute, reorder or remove like a layer.
Pan + zoom. The push-in gives the move a destination. It now goes somewhere rather than merely across.
+ Add effect → Rotate to path. This keyframes rotation so the layer turns to follow the path’s tangent — and since your path bends, the artwork turns with it. That bend is the roll.
Two adjustments make it usable. First, turn on Auto-flip: our path runs down-left, so its raw tangent points backwards and the artwork would arrive upside down. Second, add the Position & rotation effect and dial its Rotation until the first frame sits square — in the starter file that’s −22°. The preview updates as you drag, so trust your eye over the number.
Rotate to path with Auto-flip on, and a −22° constant offset levelling the opening shot.
Here’s the part worth internalising: the offset chooses where the roll starts, the bow decides how much roll you get. With a −22° offset our shot opens level and rolls to about +7° by the end — exactly the change in heading between the path’s first and last tangent. Want more? Bend the path further. Want none? Straighten it, and Rotate to path becomes a fixed Dutch angle instead.
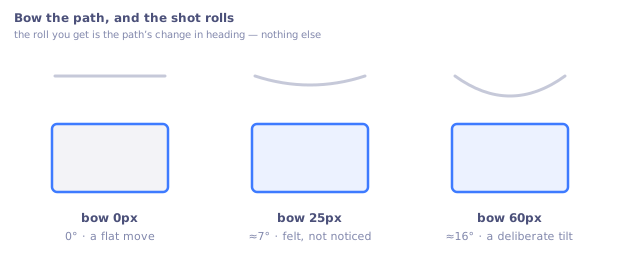
Pan + zoom + roll. Seven degrees — enough to feel, not enough to notice, which is the point of a roll.
One honest caveat: rotation happens about the artwork’s centre, so adding a roll nudges the final framing a few pixels off the Δ you measured — around 1% of the frame at 7°. Check the last frame in the preview and, if it matters, drag the path’s end point a touch. Add the roll last for exactly this reason.
This is the single most important checkbox in the whole tutorial, and it sits just above the Apply button.
Left on — the default — the plugin moves your layer so its centre lands on the path’s start point before keyframing. Perfect for a ball following a curve. Ruinous here: your carefully composed opening shot would jump to wherever you happened to draw the path.
Turn Start at path start off. The artwork stays exactly where it is and traces the path’s shape from there. That’s why step 4 said the path’s location never matters. Now hit Apply motion path.
The action bar. Uncheck, then apply.
Select City artwork and open Figma’s Animate tab. You should see four native tracks — Translation X, Translation Y, Scale and Rotation — with keyframes spaced evenly along the path, one landing on every corner. Nothing proprietary; nothing that needs the plugin to play back. Scrub the playhead and the camera moves.
Before you commit, judge the timing at the frame rate you’re shipping at. In the plugin’s preview, tap the rate pill to cycle Smooth → 24 → 30 → 60, and press expand for the full-screen theater with play, pause and stop. A slow push-in that reads beautifully at 60 can strobe at 24 — better to find that out here than in the export.
Camera work is iterative and the first pass is never right. Select the animated layer, run the plugin, and it reads the existing motion straight back in — duration, timeline offset, and which effects are on — so you adjust and re-apply instead of starting over.
Three dials are worth revisiting, in order of impact. The holds: almost every camera move is improved by a longer hold at the end than the start. The bow: reshape the path on canvas and re-apply; roll follows the curve. Speed: add the Speed effect and turn on Ease at corners for a move that slows through the turn and opens up on the straight — a real operator, not a lerp.
Framing both shots by hand is the reliable method, and it’s the one I’d use. But if you’d rather compute the path from your points of interest, the whole thing is one line. Given two points A and B in artwork coordinates, the artwork’s centre C, and a zoom factor z:
Δ = (A − C) − z × (B − C)
Ours: A = (430, 690), B = (1170, 330), C = (800, 500), z = 1.55. So Δ = (−370, 190) − 1.55 × (370, −170) = (−944, +454) — the same numbers step 3 measured.
With z = 1 it collapses to Δ = A − B: the plain mirror of the camera move, which is the rule of thumb you started with. The z term is the correction for the fact that zooming magnifies every distance, including the one you’re travelling.
Same rig, different numbers. Every one of these is a path, a duration and at most two effects.
Three of them, running. Push in, whip pan, arc reveal — same artwork, same rig, three different paths.
Because the result is native Motion, the hand-off is Figma’s, not ours. Open Dev Mode and every track is inspectable with real values and real times. Or use the plugin’s Copy as code and take the whole move out as CSS offset-path keyframes, ready to drop into the web.
Which is the argument for building camera moves this way rather than in a video tool: the artefact you produce isn’t a render. It’s a timeline your engineers can read, your design system can hold, and you can re-open six months later and re-time in about a minute.
Ten more moves native Motion can’t make on its own — each one a single practical build, each with a starter file. In order of how often people ask for them:
Still writes real, native Figma Motion keyframes.