Install Sound Kit — it’s free → See the loudness feature
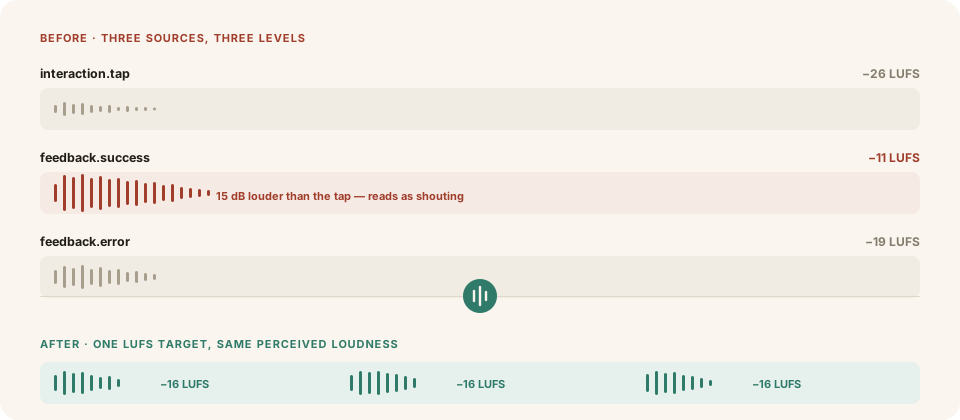
Here is a thing that happens to almost every product that adds sound. Someone picks a nice click for buttons. Someone else finds a lovely success chime. A third person grabs an error buzz from a different pack. Each choice is defensible. Put them in one prototype and the result sounds cheap — and nobody can quite say why.
It is almost never the clips. It is that they are all at different levels.
Sounds sourced from different places are mastered to different loudnesses. A chime from one library might sit six or eight decibels above a click from another. In isolation you do not notice, because you adjust. In sequence you absolutely do: the success chime feels like it is shouting, the error feels timid, and the whole set reads as assembled rather than designed.
Worse, the usual fix makes it worse. People reach for a volume slider and set each sound by ear, once, in a quiet room, on good headphones. On a phone speaker at 40% volume in an office, those judgements do not survive.
The instinct is to normalise to peak — make the loudest sample in every file the same. This does not work, because loudness is not peak. A short sharp click can peak at exactly the same value as a sustained chime and sound dramatically quieter, because there is far less energy over time and our hearing integrates.
The measure that matches perception is LUFS (Loudness Units relative to Full Scale). It weights by frequency the way your ear does and integrates over time, so two clips at the same LUFS actually sound equally loud — which is the only property you care about.
Rule of thumb: normalise to LUFS, then check peaks separately so nothing clips. Peak is a safety limit; LUFS is the design decision.
There is no universal number, but there are sane defaults, and the important thing is that every sound in your product uses the same one. Broadly:
Sound Kit ships platform presets for iOS, Android and web, so you can take the target from your platform palette instead of inventing one. Set it once and every sound you normalise lands on it.
In the Sound Kit editor, open a sound, set the loudness target, and apply. The LUFS reading updates so you can see it land. Repeat for the set — or, better, let the audit find the outliers for you.
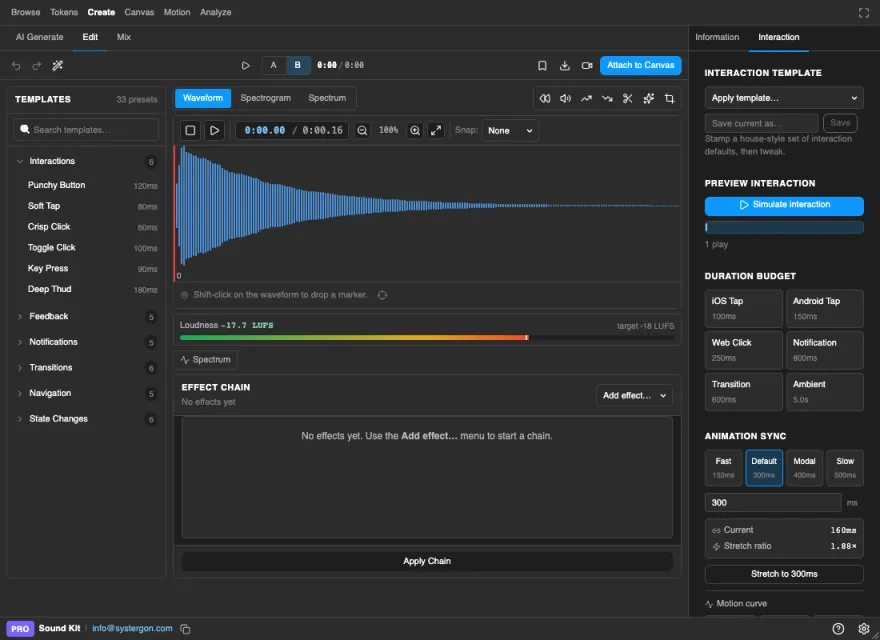
That last part is the bit people skip and then regret. Normalising once is a chore you will do; keeping a set normalised as it grows over months is a discipline nobody sustains manually. So the Consistency Report checks it for you: scan the file and it reports the loudness spread across every sound in it, names the clips sitting outside your target, and offers to normalise them in place.
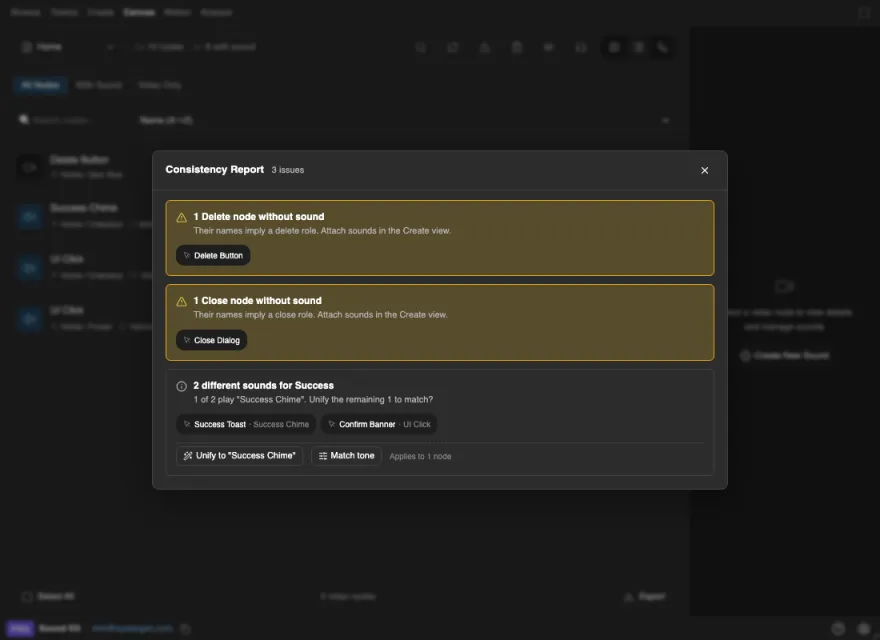
The same report catches the two other failures that travel with loudness drift — the same role using three different clips, and a screen in a flow that never got its sound — because they all come from the same root cause: sounds being chosen one at a time, by different people, with no way to see the set.
Level is the biggest lever, but it is not the only one. Two others matter enough to mention:
Harshness. A clip can be at exactly the right loudness and still be unpleasant, because too much of its energy sits in the frequencies that fatigue fastest. Switch the editor to the spectrogram, find the band, cut it with EQ. This is what separates a sound you tolerate from one you stop noticing — which for UI audio is the goal.
Startle. A very fast attack reads as alarming regardless of level. Sound Kit’s accessibility check flags clips that spike too fast or sit too bright for something a user hears forty times a day. A sound that gets your audio muted permanently has failed completely, however well-chosen it was.
If your product already has sounds and they feel wrong, here is the whole intervention:
That is usually the difference between a sound set that feels assembled and one that feels designed — and it does not require replacing a single clip.